These Pumpkin Hot Chocolate Bombs are the perfect fall hot chocolate treat!
As fall knocks on our door with its cooler evenings, shorter days, and colorful bursts of leaves, nothing seems to fit the season better than pumpkins. Pumpkin candles, pumpkin décor, pumpkin flavored drinks and food. Basically, anything and everything pumpkin. For me, seeing the pumpkin candy corn on the store shelves always puts a bit of the season’s anticipation in my step.
While many are going crazy for pumpkin spice everything (and who can blame them?), my kids aren’t big on the pumpkin spice flavor. At least not yet. One thing they do ask for the moment a nip is felt in the air is hot chocolate bombs.
These Pumpkin Hot Chocolate Bombs have all the delicious and rich flavor as my original hot chocolate bombs. But they come packaged in a cute pumpkin shell!
These make great fall gifts for anyone who likes hot chocolate. Pair it with a pumpkin mug and you have a winner!
Hot Chocolate Bombs typically take at least an hour to make due to the hardening time needed for the chocolate. So make sure to plan accordingly! I love to gather a couple of friends and settle in for a fun afternoon of bomb creating and catching up on life.
To see a video demonstration, scroll down.
Pumpkin Hot Chocolate Bomb Recipe:
- Silicone sphere molds* (I used molds with a diameter of 2.6″. They were the perfect size to fill the bottom of a mug)
- Piping bags* for the green vines
- One (11oz) bag Ghirardelli white chocolate chips
- A Hershey chocolate bar, cut into small pieces for the stem.
- Clean silicone brushes
- Hot chocolate mix of your choice (Use what you like. The higher quality the better. I ended up making my own hot chocolate mix because I couldn’t find a premade mix that I loved)
- Mini marshmallows
- Gel food coloring: orange and leaf green
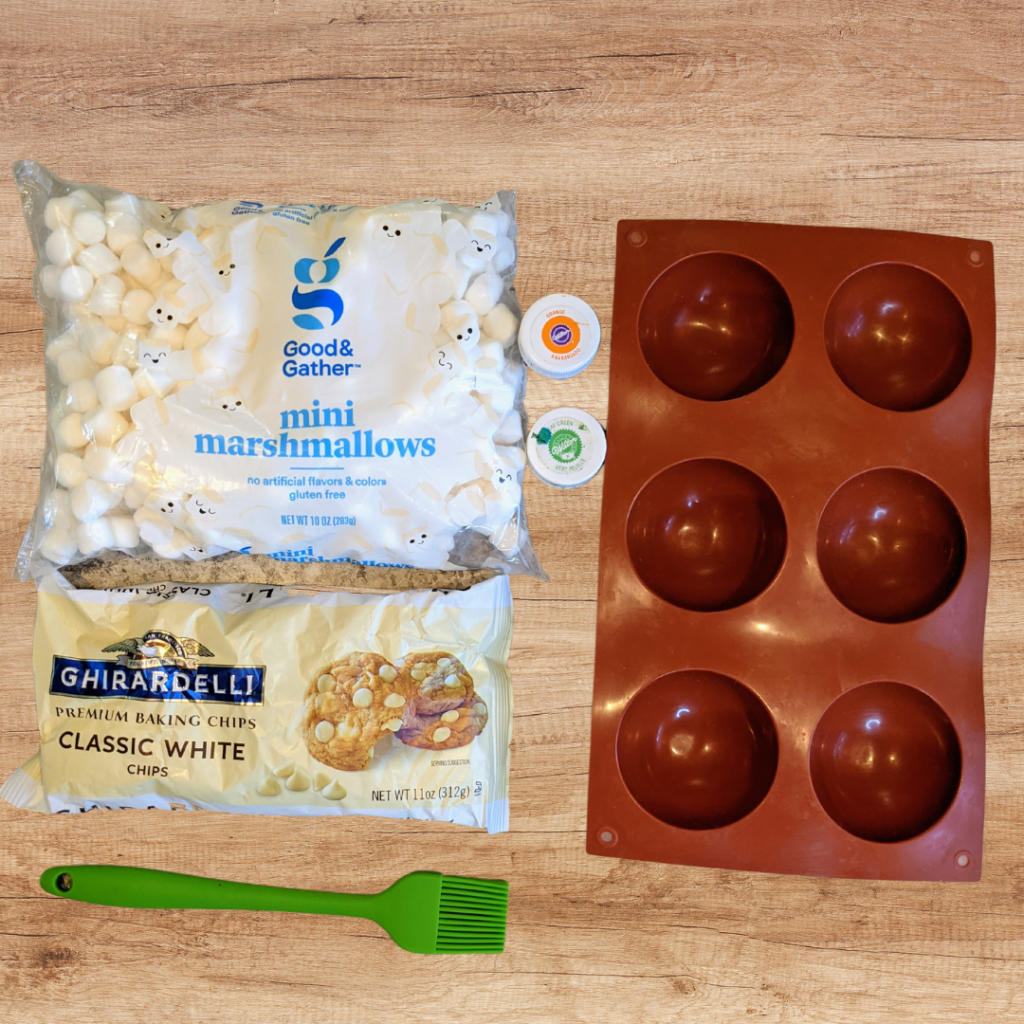
This recipes makes 6 hot chocolate bombs. Now that you have all of your supplies together, let’s melt your white chocolate. I did mine the simple way, in the microwave. Empty your white chocolate into a glass bowl. Heat for 30 seconds, and stir. Heat again for 15 seconds, and stir. Continue doing that until the chocolate is melted and completely smooth. Scoop out 1/4 cup of your melted white chocolate into a separate bowl and set to the side.
Color the remaining white chocolate with the orange dye. I used toothpicks to retrieve the dye. Stick them into the gel dye and add them to your chocolate. Doing this twice achieved the color I desired. Feel free to color the orange to your likeness.
Grab your silicone brush and brush the orange chocolate into the silicone spheres. Make sure you brush completely up the sides. Put the mold in the fridge for five minutes. Once set, repeat brushing the orange chocolate in the molds. Refrigerate again for ten minutes.
While your spheres are in the fridge, take the 1/4 cup white chocolate you put to the side earlier, and add your green gel dye to it. It won’t take much. Mix well, and put into a piping bag. I don’t bother using a tip for this; I just cut a small opening from the end of the bag. If you want to use a tip, I would recommend Wilton #5 or #6.
How to Assemble the Pumpkin Hot Chocolate Bombs
Carefully remove the chocolate from the molds and set them to the side. I found that putting them on an upside down muffin pan worked well. Fill half of the bomb with 2 tbsp of hot cocoa mix and a small mound of marshmallows.
To fuse the spheres together, heat a saucepan over low heat. Once warm, pick up the unfilled sphere and heat in the pan for around five seconds. Once it begins to melt around the edge, place on a filled sphere, and hold together for ten seconds. Repeat until they are all done.
To Decorate the Pumpkin Hot Chocolate Bombs
Using your piping bag with green chocolate, start at the top of your pumpkin bomb and twirl a vine to one side of the bomb. Repeat on the second side. Do this for all of the bombs.
To make the stems, grab a piece of your cut up hot chocolate bar. Warm one end of the chocolate. I used a Bic lighter, but you could also hold your chocolate stem briefly over a hot pan or hot stove for a few seconds. You want it heated just long enough to get melty on one end so it will stay in place on top of the pumpkin bomb. Repeat with all the bombs.
Allow the bombs to set for 30 minutes before packaging.
Instructions for How to Use a Hot Chocolate Bomb
Place the bomb of your choice in a mug. Heat 10 ounces of milk until steaming on the stovetop. Slowly pour over the bomb until it opens and your mug is full. Give it a stir and enjoy!
You may also like Planet Earth Hot Chocolate Bombs or 5 Cozy Recipes for Rainy Days.